

How to Make a Beaded Hydrangea Tabletop Arrangement
Bobble Sprig · The making collection
Beaded Hydrangea
Make three rounded heads with 100 flowers and nine leaves, then arrange them in a little pot. Allow about two hours. No glue is used.
View the Hydrangea DIY Kit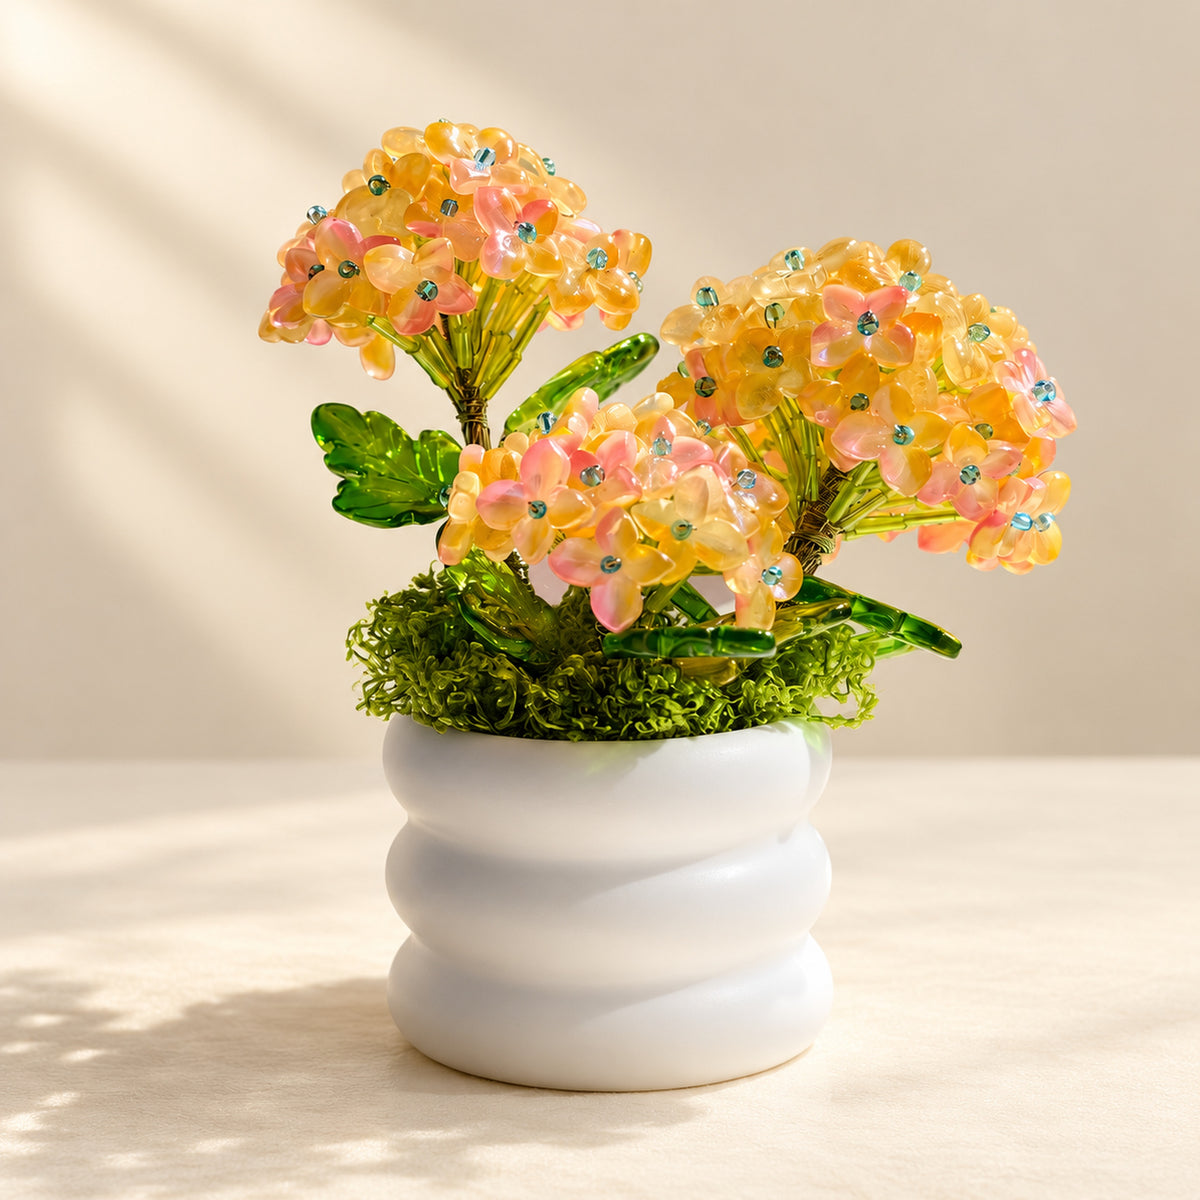
Materials and tools
- 100 flower-shaped beads
- 100 seed beads: one flower center each
- 200 green tube beads: two per flower
- 9 leaf beads: three per stem
- Supplied 0.3 mm craft wire
- One flower pot (about 5 cm high × 5.5 cm wide)
- High-density foam insert and artificial grass
- Bring your own scissors, wire cutters and ruler
Quantities describe the making recipe, not exact packed quantities or spares. Leave sufficient working wire for leaves, binding and wrapping.
| Stem | Target height | Flowers | Full cut | Folded | Leaves |
|---|---|---|---|---|---|
| A · left | 11 cm | 30 | 22 cm | 11 cm | 3 |
| B · middle | 9 cm | 50 | 18 cm | 9 cm | 3 |
| C · right | 7 cm | 20 | 14 cm | 7 cm | 3 |
STEP 01 / 10
Prepare three groups
Prepare 30 full wire pieces at 22 cm for stem A, 50 at 18 cm for stem B, and 20 at 14 cm for stem C. Each piece makes one flower. Folded in half, these are 11, 9 and 7 cm. These folded wire lengths are separate from the target finished stem heights. In the reference photo, A is left, B is middle and C is right; each stem gets three leaves. Keep extra working wire for leaves, binding and stem wrapping. Set out the beads, pot, foam and grass. Bring your own scissors, wire cutters and ruler. No glue is used.

STEP 02 / 10
Make the flowers
Thread one seed bead onto a wire piece from the correct group. Fold the wire in half with the seed bead at the fold. Pass both ends together through one flower-shaped bead, then through the first green tube bead. Pass only one end through the second tube bead; the other end stays outside it. Slide the beads snugly together. Twist the two ends together so the second tube bead is held firmly between them. Repeat this same two-tube method for all 100 flowers: A has 30, B has 50 and C has 20. Do not change the bead recipe for a shorter stem.

STEP 03 / 10
Shape the center
Take some flowers from the group for the stem you are making. Hold the wire stems just beneath the tube beads. Push the flowers gently upward and align their gathering point. Adjust the outer flowers slightly outward to form a rounded surface. There is no fixed center count: reserve enough of this group to build the outside, and keep within its total of 30, 50 or 20 flowers.

STEP 04 / 10
Bind and build outward
Take a separate binding wire and leave an end you can hold comfortably. Wrap it tightly around the gathered stems, just below the tube beads, to secure the center. Add flowers from the same group around the outside. Gather each round, adjust the curve, and bind it firmly before adding more. Fill visible gaps and keep the head rounded. Continue until this stem contains its assigned total. The number in each round is flexible; you do not need a wrap after every individual flower.

STEP 05 / 10
Complete three heads
Complete the other two flower heads with the same gathering, adding, shaping and binding method. Check the totals: A uses 30 flowers, B uses 50 and C uses 20. B has the most flowers even though A is the tallest target stem. Trim surplus binding wire and straighten the remaining stem wires. This footage shows a binding finish and the start of another head; it does not show all three heads being built continuously.

STEP 06 / 10
Make nine leaves
Pass a wire through the hole at the base of a leaf bead. Bring one end around and back through that same hole once. Pull the small loop snug against the leaf. Bring the two ends together beneath it and twist them into a leaf stalk. Leave enough wire to wrap the leaf stalk around the main stem. Make nine leaves in total, three for each stem. Leaf wire has no fixed cut length in this recipe; allow enough for the return pass, twisting and attachment. Do not add seed beads or tube beads here.

STEP 07 / 10
Add three leaves per stem
Position a leaf below the flower head with its face turned outward. Wrap the leaf stalk’s own wire tails around the main stem and pull snug. Add the second and third leaves in the same way, adjusting their height and direction as you attach them. Repeat for the other two stems, using three leaves on each. The leaves can be shaped freely; the count stays at three per stem. No glue is added.

STEP 08 / 10
Wrap and finish the stems
Gather the loose wires below the flowers and leaves. Take a separate wire and wrap closely around the bundle to make a firm main stem. Trim surplus wrapping wire from the side and press the end flat against the stem. Check the target finished stem heights: A 11 cm, B 9 cm and C 7 cm. If an assembled stem is longer than you want, trim its bottom with wire cutters. This optional main-stem trim is separate from trimming a wrapping tail. Main-stem trimming is explained in the height reference; the footage shows only the wrapping-wire trim. Leave enough working wire for wrapping rather than using an invented fixed length.

STEP 09 / 10
Fit the foam and pot
Trim the high-density foam with scissors to fit your pot and preferred arrangement. Foam shaping is a confirmed preparation instruction; the video begins with already trimmed foam. Put it into the pot and press it securely into place. Make suitable small stem openings, then insert all three stems one at a time. Adjust their position, insertion depth and direction to create different displayed heights. The pot is about 5 cm high and 5.5 cm wide. No fixed foam dimensions or insertion depth are prescribed, and no glue is used.

STEP 10 / 10
Cover and shape
Once all three stems are secure, tease the artificial grass apart and lay it around the stems over the foam. Cover exposed filling and tidy the rim. Adjust the flower heads, leaf angles and displayed heights to the shape you prefer. The finished recipe uses 100 flowers and nine leaves across three stems. Allow about two hours of hands-on making; the video running time is not crafting time.

Wire measurement, optional main-stem trimming and foam shaping are confirmed written instructions; those actions were not filmed.


